Introduction to Sharpen A Tool.com
.
The Introduction to Sharpen a Tool. The following articles intend to inform various methods to Sharpen a Tool to obtain a good cutting edge on the most common tools used by the average woodworker.
All woodworking tools need to be kept sharp to get the best results.
Please note:
If viewing from Canada, France or United Kingdom articles selected to view may be substituted for an equivalent model if the selected model is not available in your country.
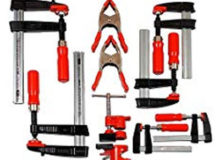
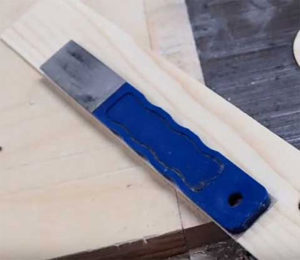
The Chisel Using The Grit Paper Method
This method is ideal to introduce anyone who is beginning to start using woodworking chisels ad doesn’t want to invest in expensive tool sharpening equipment.
But wishes to get the best use of the chisels, this description is to give a guide to a method that will give good results for sharpening hand tools.
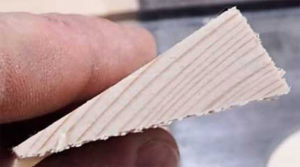
At first check the flatness of the back of the chisel with a strait edge, it preferably should be slightly hollow.
If it it is a new chisel remove any protective coating that the manufacturer has put on to prevent rusting.
A selection of wet/dry Emery paper from about 200 grit to very fine about 2500 grit.
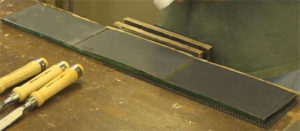
A perfectly flat surface to fix the Emery paper on, such as a piece of plate glass or a disused marble top.
Affix the Emery paper onto the fat surface either by adhesive or Masking tape.
Affix the paper grit to the flat surface so they are starting in line from the coarse grit followed by the next grit and finally ending with the finest grit.
A good flat surface can be plate glass or a marble top, use masking or double sided sticky tape.
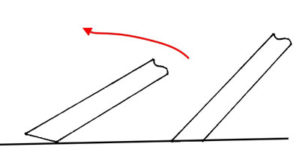
Then place the flat side of the chisel on the course grit and using a circular motion grind the back of the chisel.
It is not necessary to grind the complete back just the first few inches from the cutting edge.
After a few circular turns lift the chisel off the abrasive paper, be careful to lift the cutting edge off fist to ensure no inadvertent damage to it.
Wipe the area to see the area that has been ground, the area has to be from edge to edge and at about 2 inches from the tip.
Once that is achieved continue grinding but gradually using finer grits until there is a mirror like finish.
Next face to polish is the bevel, if the bevel is flat then careful attention must be made in honing as the face has to be kept flat.
Doing it by hand is essential that the angle is maintained and the chisel is dragged along the the paper grit away from the cutting edge.
Starting with the course grit and using all the grit papers ending with finest to end with to obtain a flat mirror finish.
Check the cutting edge to determine if there is a bur on it,to remove it put the flat back of the chisel unto the fine grit paper and drag it away from the cutting edge and the again onto the bevel face.
Repeat until no bur can be felt, the chisel is now ready for use, a lot of users go one step more bur honing the chisel onto a piece of leather to get a super fine edge.
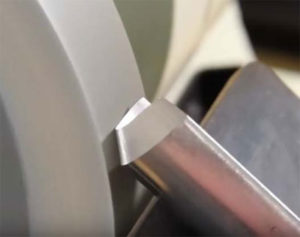
 To show that putting the heel of the taper onto the grinding surface first then tip the chisel up until the taper is in complete contact with it.
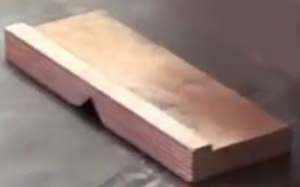
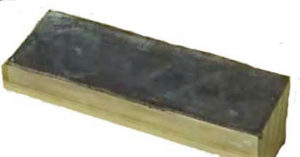 A piece of leather glued to a wooden block to strop the chisel for a very sharp cutting edge.
The normal angle of the taper set by the manufacturer is 25 degrees.
Should you prefer an angle of say 28-30 degrees it is not necessary to grind the complete taper.
Set the chisel at the angle required and using just the fine grind paper and drag the chisel 3 or 4 times along the it.
Using this method when the chisel dulls it will only be necessary to repeat this action to revive the cutting edge.
A very good Video on Youtube by Paul Seller using the paper grit method.
“Preparing and Sharpening Woodworking Chisels”
The Chisel Using Whetstones

.
This is to ensure that the cutting edge is not accidentally damage.
.
Hand Grinding The Chisel Taper 
To determine the bevel onto stone put the heel of the bevel onto the stone and rock it slowly forward.
.
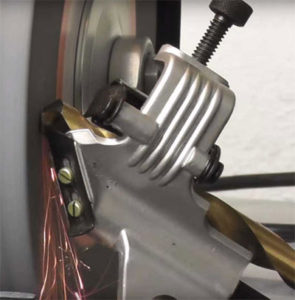
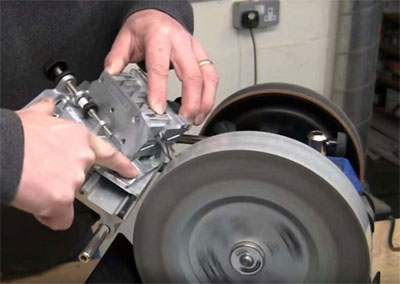
Grinding The Taper Using A Honing Jig
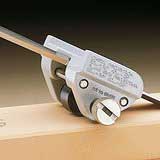 Using a honing jig takes the uncertainty out of grinding the taper on a chisel and gives repeatable results.
 Sharpening Wood Turning Chisels
- Bench Grinder
- Eye protector glasses or goggles
- Grind wheel dressing tool
- Honing stone
- Protractor
Before any grinding procedure ensure that the grinding wheel is free of embedded material from previous use and flat across the face of it.
Roughing Gouge

Spindle Gouge Sharpening
The Spindle gouge is a combine angled chisel and so requires more attention to the grinding.
.
The cutting angle is relative stable, but the angle can be ground at a sharper angle for more delicate work.
.
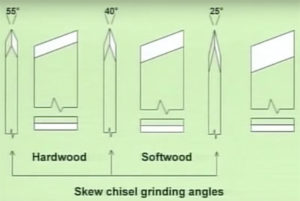
The Skew Chisel
Scraper Sharpening
Parting Tool
Chisel Grinding Jigs and Fixtures
 This is the set-up for grinding a gouge chisel, the distance is set with the grind wheel stationary, to find the angle on the tool that is required.
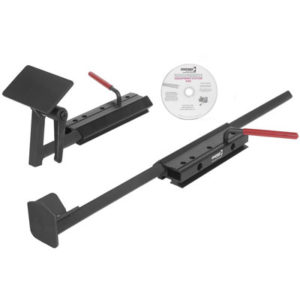
Alternative method using platform attachment.
Set the platform at the required angle, checking in the same method as above with the marker pen.
.
The gouge has to be kept in contact with the platform and the chisel at right angles to the surface of the wheel.
.
The rotation of the chisel from flute to flute needs to be a smooth action, more attention is needed with this method.
.
The same attention as above regarding safety and heating of grinding action.
.
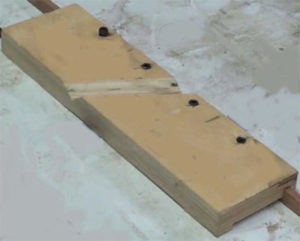
The following is an attachment to grind sweeps.
.
 This and other home made attachments allow the tool to be rotated from side to side allowing a sweep grind to be made.
The platform attachment is a very useful tool for grinding a variety of chisels such as Parting, Skew and Scraper.
.
All that is needed is to set the Platform at the angle required and apply the tool flat on the platform and set to any offset angle to the grinder that is needed required, ie skew chisel.
Drills
Twist Drill tool resharpening
Two Items that are required:
- Protractor
- 6″ Steel ruler


The photo is a recommended type of protractor
.
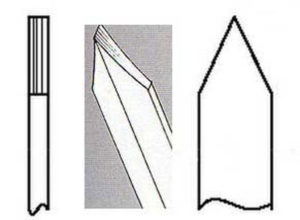
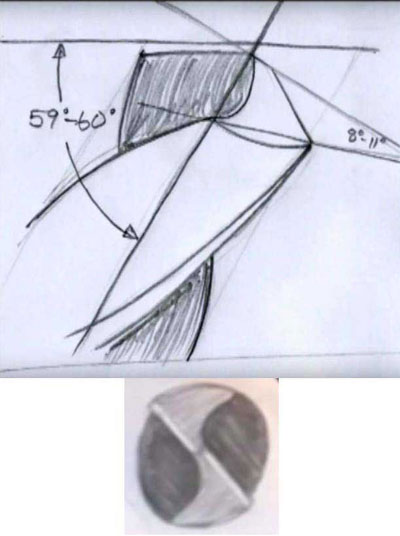
The angles and profile of a standard twist drill.
.
It is essential to keep the two cutting edges are kept equal as to ensure the point of the drill is central.
.
This is to ensure that the hole that is made is the the size of the drill and not over-sized.
.
If a drill isn’t sharp it certainly wont cut efficiently.
.
Trying to force it to will generate excessive heat and eventually make the drill unusable.
.
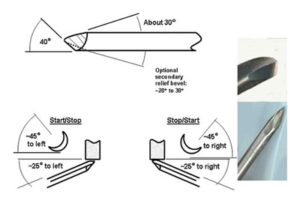
The drill needs to be presented to the grinding wheel at 59o.
.
To give a guide set the protractor at 59o lay it on the tool rest and mark the tool rest with a marker pen.
.
Hold the drill near the tip of the drill with the thumb and forefinger of the right hand and the shank with the left hand.
.
Wearing safety glasses, present the drill to the grind stone.
.
With the forefinger resting on the tool rest, just above the centre of rotation.
.
The cutting edge parallel with the centre of rotation of the grinding wheel.
.
Then gently allow the drill into contact with the wheel.
.
Then lower the left hand still keeping contact with the wheel so the the drill rides up the wheel.
Not too far, this is so the cutting edge of the drill has some clearance to prevent it rubbing when drilling.
.
Check with the protractor the angle and if it is not exact make any necessary adjustments to achieve the correct angle.
.
Turn the chisel and grind the other cutting edge, then check the angle and this time measure each length of the cutting edge.
.
They need to be the same so the the point is in the centre if required grind the shorter of the cutting edge to make then equal.
.
On large diameter drills it is advisable to grind a secondary clearance relief to ensure there is sufficient clearance to prevent any possible rubbing contact when drilling.
.
A very good video on you tube is:
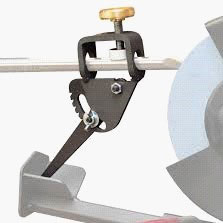
Twist Drill Jigs And Fixtures
There are many jigs, fixtures and special machines for sharpening drills but unless you have a vast amount of drills it is not cost effective to purchase the top end of the range.
.
There are some simple home made jigs that can be made with little cash outlay.
The pictures above are home made for assisting sharpening by grinding, there is a rebate on the underside to allow the fixture to slide parallel to the grindstone.
The angle of the ‘V’ groove is cut to give the correct angle of the twist drill.
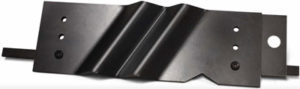 This jig has since been fabricated in metal:
The video shows how it is used:

Comparison of 2 Drill sharpening accessories

The first photo is a “Craftsman Drill Grinding Attachment” it gives very good results but it uses the side face of the grinding wheel which is not recommended by wheel manufactures.
The Drill Doctor was bought by the tester second hand and on test found to be not easy to set up and use and gave poor results.
The video link of the test follows:

Home Made Belt Sander
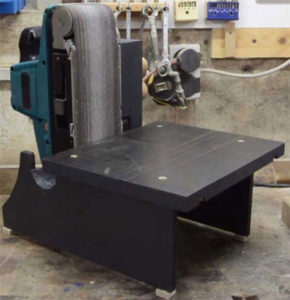
- Very little dust
- Easy change of belt
- Dual purpose use of sanding too.
Home Made Disc Grinder
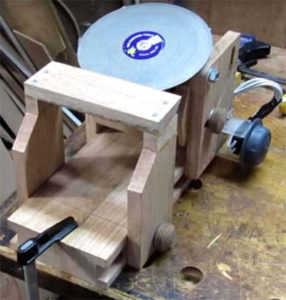 This is a home made disk grinder would also be a possible machine to use the Craftsman Drill Grinding Attachment as well as sharpening a great many woodworking tools.
 Tormek Grinding System
To purchase the Tormek grinding system just to sharpen drills would be a very expensive drill sharpening equipment.
If the machine was purchase as an overall sharpening system for all your woodworking tools it is a very good investment.
The wheel is water cooled and slow running so has the many advantages over the standard bench grinder.
No sparks, dust and grinding continuously with the danger of overheating the tool being ground.
The drill grinding attachment is easy to fit and gives a precision 4-facet sharpened point eliminating some of the problems associated with the normal chisel point.
The following video link demonstrates the sharpening process:
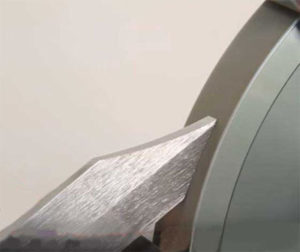
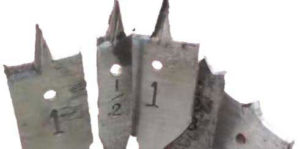
Brad Point Drill
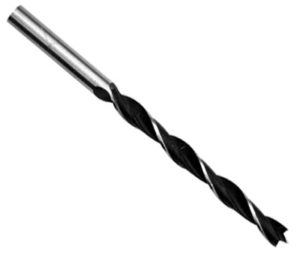 The standard bought Brad-point bit is as shown in the photograph:
They can be made from standard twist drills, that are no longer required or even broken and in the process that follows can be used to sharpen Brad-point bits.
The first thing to be undertaken is to grind the drill to produce the cut-away leaving sufficient metal to produce the point.
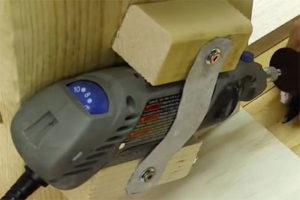
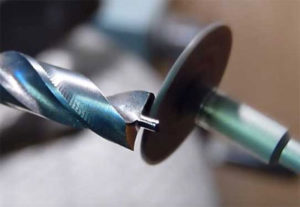 The twist drill is put into a drill press and set up a Dremel or similar drill with a small grinding disk setup.
The result is the photograph below.
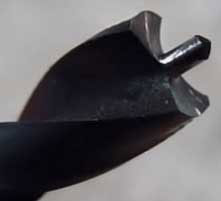
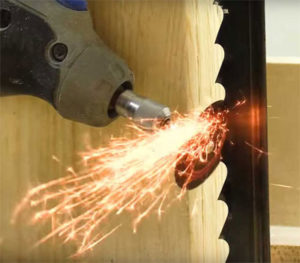
 Having produced the basic shape now to get the cutting edge.
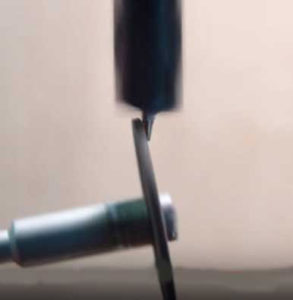
Using the Dremel by hand grind the back rakes avoiding the spigot for the point and grinding away any of the cutting edge.
This can also be a method of sharpening a Brad-point drill.
All that is left to do is to establish the point.
This is done by putting the drill back into the drill press and grind the point using the Dremel in hand with the drill press rotating.
The video showing this operation:
Spade Drill Bits
 Examples of spade bits: Providing they are not hardened drill bits they can either be sharpened on a grind wheel or with a metal working file.
With a grind wheel the platform is set at a suitable angle.
Then lay the drill bit on the platform using the right hand side of the wheel gently grind the drill bit.
If it is being sharpened for the first time it will have pointed spurs so this means they will be ground away but they will still cut.
Turn the drill bit over and grind the other side, if necessary touch up the point.
Should the outer side of the drill are dull they can be touch up gently to ensure a clean hole id produced. Do not remove too much metal or the hole size will cut small.
.
To sharpen with a file, clamp the drill bit low in a vice so that when filing the bit doesn’t vibrate. File the cutting edges maintaining the cutting angle.
Finally touch up the point be careful not to touch the cutting edge. Remove any burs produced by filing.
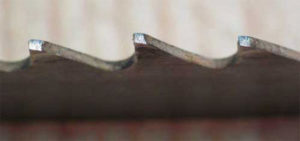
Hand Saw Sharpening
Equipment Required
- A Triangular file
- Saw Set
- A Flat file, if the teeth are worn uneven
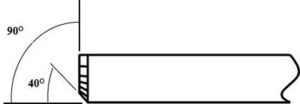
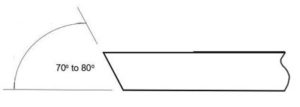
There are 2 configurations of saw teeth angles, the Rip saw is sharpened at 90o and a Crosscut Saw is sharpened between 75o-80o .
Each tooth is offset a small amount so that the saw cut is bigger than the saw blade to prevent binding and allow an easy cutting action.
 Cut slots across 2 off-cuts of 4 x 2, one slot at 90o and the other at 75o-80o about 1/4 inch deep.
These to be used as a guide when filing the teeth.
Clamp the saw between 2 lengths of wood so that the teeth of the saw are clear of the wood about a 1/3 inch.
Mark along the top of the teeth with a black felt tipped marker pen, this will show which teeth have been sharpened when the black marks have been removed by the file.
Put one of the 2 off-cuts, depending on the type of saw to be sharpened on to the saw to give a guide to the angle of the file.
Sharpening a Rip-saw file every other tooth then turn the saw round and file the teeth not sharpened, if a cross-cut saw file every tooth.
Should this be the first time the saw needs sharpening then this is all that will be require to bring the saw cutting action back.
However if the teeth are worn away and not level then it will need to use a flat mill file to level the teeth, it is essential that the file is kept at right angle to the saw blade.
If in doubt it is possible to purchase a Saw Jointer, this clamps the file and has a lip that slides along the face of the saw and keep the file in the correct position.
Then re-sharpening will take some more time and attention, each filing action will take off more metal from some of the teeth.
The action continues until each tooth has come to a point and no flats remain generated by the flat mill file.
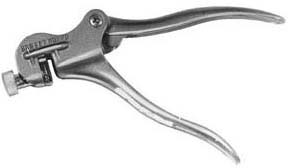
Having made all the teeth level and sharp they now require to be set with a Saw Setting tool.
The tool is relatively easy to use it has an anvil which is set to the size of the teeth and then placed over the tooth to be set and the plier action is closed and a plunger pushes on the tooth and bends it slightly.
The amount of bend is determined by the set on the anvil, continue along the saw bending every other tooth.
Then go along the other side of the saw blade setting the teeth that have not been set, this action produces a cut that is wider than the saw blade.
A very good video explaining all aspects of saws is given by:
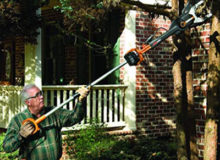
Chain Saw Sharpening With A File
Equipment required
- Round file of the correct diameter
- Flat file
- A vice or some form of clamping the saw
- File guide
- Depth gauge
- Protective clothing
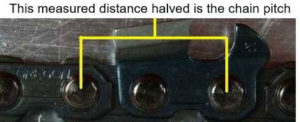 To determine the size of the correct file the distance between 3 consecutive rivets along the chain and is divided by 2.
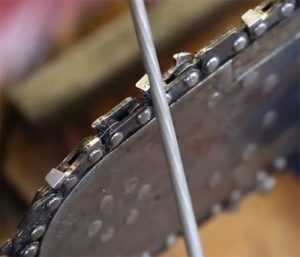 Lightly clamp the chainsaw bar in a vice and check the condition of the chain.
Files only cut on the forward stroke, do not put pressure on the back stroke so maintain a good life of the file, also occasionally rotate the file.
The are a good many filing jigs as an aid to ensure that the file is held at the correct angle. The above procedure applies just the same but minimizes any sharpening errors.
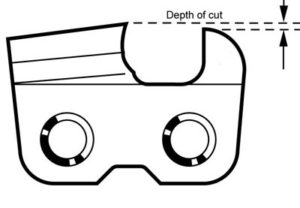
Having sharpened the cutting blades the next item to check is the depth of cut, this is obtained with the use of another jig.
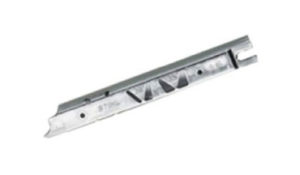
The Powersharp Chainsaw Attachment
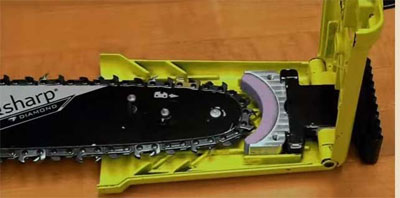
The Powersharp attachment requires some changes to be made to the chainsaw.
The complete kit including the attachment can be purchased for various models of chainsaw.
Once assembled the sharpening process is simple and quick,but there is no indication as to how many times the chain can be sharpened before the chain needs replacing.
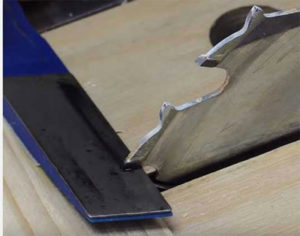
Circular Saw Sharpening
Circular saws present some difficulties in respect of their shape, size and design.
The modern saws are mainly carbide tipped and care must be taken when using grinding disks not inhaling the carbide dust and to wear protective goggles and gloves.
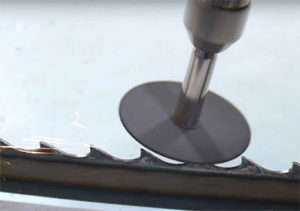
 One very simple method is to affix with double sided adhesive tape diamond sharpening sticks to a length of wood cut about 200 angle.
This arrangement is then set under a tooth of the saw whilst still in the Circular saw machine.
Holding the saw blade against the diamond sharpening stick move it too and fro at right angles to the blade and lubricate the stick.
Continue this to each tooth of the blade until all have been ground.
Clean off the lubrication from the diamond sticks and the saw disk. Your saw table is now ready for use.
This form of tool resharpening is only possible when the tooth is at right angles to the circular saw blade.
The following Video illustrates the method:
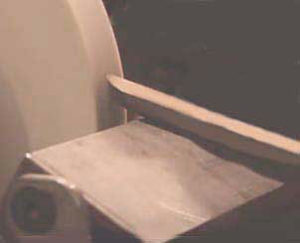
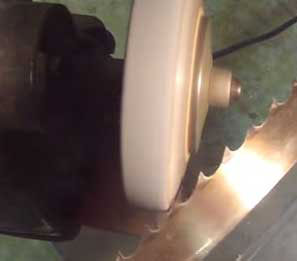
 The photo is showing another sharpening method.
A diamond disk is put in place of the Circular saw and is used to grind the teeth of the circular saw.
A packing piece is placed under the saw blade to prevent any damage to the saw table.
This method requires a steady hand and the need for protective gear is paramount, be aware of any carbide dust which is harmful.
A video of the process follows:
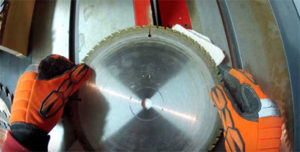
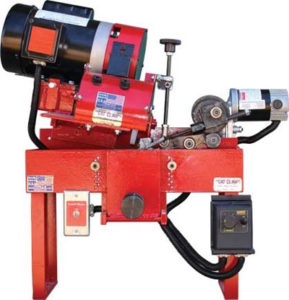
Circular Blade Sharpening Machines
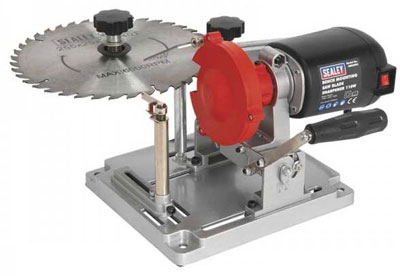
The is a photo of a circular saw blade sharpening machine, it is a cheap Chinese copy.
The presenter in the following video gives a very good presentation of the shortcomings of the equipment.
He also suggested some easy solutions and finally did a test sharpening of a blade with good result:
This machine is of much better quality, the video does not have any spoken commentary so there is no explanation of how the presenter makes the various adjustments.
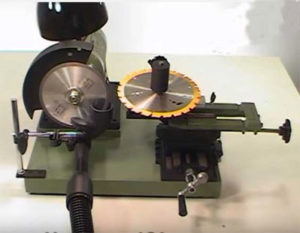
There is a vacuum point take off at the point of grinding so eliminating the possibility of contaminating the operator.
The only down-point is there is no sprung loaded ratchet to locate the tooth to be ground, so it is left to the operator to judge how much metal is removed.
This in time can make the teeth of the blade uneven. The good quality is also reflected in the higher cost compared with the previous machine.
The video shows the benefits of the sharpener:
Bandsaw Sharpening
There are several methods to sharpen band saws each one gets good results.
 In the photo the operator is just using a bench top grinder without guards.
Hence Pitch limitation of the teeth able to grind.
The results from this were as shown in the following video:
 The following method is a completely different approach to sharpen a bandsaw.
It uses a Dremel tool with a disk grinding accessory to grind the top of the teeth.
The benefit of this method is that the operator sits down to do this operation.
The disadvantages are that this method of sharpening has a limited number of times it can be done.
Therefore to eliminate possible bandsaw cracking no gullet grinding.
On Site Operation With Hand Held Disk Grinder
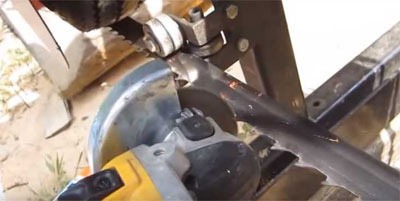 This set up is done on site and uses an angle grinder.
Using this method requires some skill in operating the grinder..
Furthermore to keep a minimum operation. So the sharpening must be quick.
This is an operation for large pitch commercial blades. not for the hobbyist
The following video demonstrates the operation:
Sharpening Band Saw Blades With The Blade Still In The Machine
 This set up was a quickly made but is very effective as it can be used with band saw blade still in place in the band saw machine.
Probably a very good benefit if successful sharpening. Consequently a very good result.
 The only disadvantage is that no possibility to clean up the gullet to minimise the effect of cracking due to the flexing of the band when curving over the driving wheels.
Battery Operated Band Saw Sharpener Automatic Grinding Machine
 The sharpener is battery operated which makes this machine very portable.
It runs off a 12 volt car battery and will be able to continual working for a whole day on a fully charged battery.
The grinding action is completely automatic so once set up and running releases the operative for other duties.
First of all a bracket to the blade start position. For the reason that it stops the machine. When the complete blade is sharp.
The video demonstrates the full assembly procedure and the operation of the sharpener in complete detail:
Cook’s Bandsaw Sharpener
 This is one of the top of the range of for sharpening blades up to 4” automatically.
It is fully adjustable for aspects of blade grinding including the gullet.
All adjustments are shake-proof so once set hey will not alter during operation.
Because this expensive machine, certainly not, for the hobbyist. Due to the commercial basis requires constant usage.
The following video demonstrates the product attributes:
See more articles on sharpen a tool here…